
WordPress Performance Mastery 2025: Guide to AVIF, WebP, & Lazy Loading
TL;DR: Optimizing images and videos on WordPress is essential for improving site performance, SEO, and user experience. Using next-generation formats like WebP and AVIF reduces file sizes without sacrificing quality, while implementing lazy loading ensures that off-screen media only loads when needed, speeding up page load times. Hosting videos externally rather than directly on your server prevents excessive load, and leveraging a CDN helps deliver media quickly to users worldwide. Together, these strategies enhance Core Web Vitals, decrease bounce rates, and provide a faster, smoother browsing experience for visitors.
Table of Contents
- Introduction: Why Media Optimization is Non-Negotiable in 2025
- Part 1: The Next-Gen Image Format Showdown: AVIF vs. WebP (Deep Dive)
- Part 2: Implementing Next-Gen Images in WordPress: A Step-by-Step Guide
- Part 3: Mastering Lazy Loading in WordPress
- Part 4: Advanced Video Optimization for WordPress
- Part 5: Measuring Success & Finalizing Your SEO Workflow
- People Also Ask (FAQ)
- Conclusion: From Optimized Media to Market Dominance
What is WordPress Image & Video Optimization?
Optimizing images and videos is essential for enhancing website performance, SEO, and user experience. Unoptimized media can significantly slow down page load times, leading to higher bounce rates and lower search engine rankings. This comprehensive guide delves into advanced techniques such as converting images to next-gen formats like WebP and AVIF, implementing lazy loading, and utilizing external video hosting to ensure seamless performance. By adopting these strategies, you can achieve faster load times, better Core Web Vitals scores, and improved user engagement.
Key Benefits of Choosing the Best WordPress Hosting Providers for Performance and Support
-
Enhanced Site Speed: Top hosting providers offer optimized servers and caching solutions, ensuring faster loading times for your website.
-
Reliable Uptime: Reputable hosts guarantee high uptime percentages, minimizing website downtime and ensuring consistent availability.
-
Expert Support: Access to knowledgeable support teams who can assist with technical issues and provide guidance on optimizing your site.
-
Scalability Options: As your website grows, top hosting providers offer scalable plans to accommodate increased traffic and resource demands.
-
Security Features: Leading hosts implement robust security measures, including firewalls and malware scanning, to protect your website from threats.
By selecting a hosting provider that prioritizes performance and support, you can ensure your WordPress site operates efficiently and securely.
Why Media Optimization is Non-Negotiable in 2025
In the digital landscape of 2025, website performance is not a feature; it is the foundation upon which user experience, conversion rates, and search engine visibility are built. While many WordPress site owners obsess over caching plugins and hosting providers, they often overlook the single largest contributor to page bloat: unoptimized media. Images and videos can constitute nearly 70% of a page’s total data, making them the primary bottleneck for a fast, responsive website .
The Core Web Vitals Imperative
Since Google integrated Core Web Vitals into its ranking algorithm, the technical performance of a webpage has become inextricably linked to its SEO potential. These metrics are designed to measure real-world user experience, and media optimization directly impacts all three:
- Largest Contentful Paint (LCP): This metric measures the time it takes for the largest visible element (usually a hero image or video) to render. Large, unoptimized media is the number one cause of poor LCP scores. Case studies have shown that effective image optimization can reduce LCP time by a staggering 80% .
- Interaction to Next Paint (INP): Replacing the older First Input Delay (FID) metric, INP measures a page’s overall responsiveness to user interactions. When a browser is busy downloading and rendering heavy images, it can’t respond quickly to user clicks or keystrokes, leading to a sluggish experience and a high INP.
- Cumulative Layout Shift (CLS): This measures visual stability. Images that load without defined dimensions cause content to “jump”; around the page as they render, creating a frustrating user experience and a poor CLS score. Proper optimization includes specifying image sizes to prevent this.
Failing to address these vitals is no longer an option. A Google study revealed that a page load delay from 1 to 5 seconds increases the probability of a user bouncing by 90% . The message is clear: speed is not just a recommendation; it’s a prerequisite for user retention.
The SEO & Conversion Connection
The correlation between page speed and business outcomes is well-documented. Faster load times lead directly to lower bounce rates, higher user engagement, and, most importantly, increased conversions. E-commerce giants have quantified this relationship for years. Amazon famously calculated that every 100ms of latency cost them 1% in sales, a figure that would translate to billions today . Similarly, a case study by Rakuten showed that implementing structured data and performance optimizations led to significant traffic increases .
For a WordPress site, this means every unoptimized image is a potential lost sale, a missed lead, or a visitor who never returns. In a competitive market, media optimization is a high-impact, low-effort lever for tangible business growth.
The WordPress Context: Beyond the Basics
To its credit, the WordPress core team has made significant strides. Native support for next-generation image formats like WebP (since version 5.8) and AVIF (since version 6.5) is now built-in . Furthermore, native lazy loading for images and iframes has been the default since version 5.5 . However, relying solely on these defaults is a recipe for mediocrity.
True performance mastery requires a strategic, multi-layered approach that automates conversion, provides robust fallbacks, handles complex media like videos and background images, and integrates seamlessly with a global delivery network. This guide provides that comprehensive strategy. We will move beyond the basics to provide advanced, actionable workflows for developers and site owners to not just improve their site speed, but to achieve a level of performance that will dominate search rankings and delight users in 2025 and beyond.
Part 1: The Next-Gen Image Format Showdown: AVIF vs. WebP (Deep Dive)
Core Concept: The Pursuit of Perceptual Losslessness
The fundamental goal of modern image optimization is to achieve the smallest possible file size with little to no perceptible loss in quality. For decades, JPEG and PNG were the workhorses of the web. JPEG excelled at compressing photographs through “lossy”; compression, while PNG handled graphics with transparency using “lossless” compression. However, both are now legacy formats, surpassed by more efficient algorithms.
Enter the next-generation contenders: WebP, developed by Google, and AVIF (AV1 Image File Format), developed by the Alliance for Open Media. Both formats offer superior compression over their predecessors, supporting features like transparency and animation in a single, versatile package. The choice is no longer just between JPEG and PNG, but between the excellent efficiency of WebP and the state-of-the-art power of AVIF .
Quantitative Comparison: AVIF vs. WebP
As of mid-2025, the WordPress ecosystem has fully embraced both formats. Choosing between them requires a nuanced understanding of their respective strengths and weaknesses. The decision hinges on a trade-off between maximum compression, browser compatibility, and encoding resources.
| Feature/Metric | WebP | AVIF | Key Decision Points (As of July 2025) |
|---|---|---|---|
| Compression Efficiency | Excellent. Approximately 25-35% smaller than an equivalent quality JPEG . | Superior. Approximately 50% smaller than JPEG, and often 20-30% smaller than WebP for the same visual quality . | For maximum performance and bandwidth savings, AVIF is the clear winner. This is critical for mobile users and improving Core Web Vitals. |
| Image Quality | Very good, but can exhibit artifacts like color banding or blurring at higher compression ratios. | Exceptional. Retains more detail, textures, and color fidelity at equivalent file sizes due to the advanced AV1 codec . | For photography portfolios, e-commerce product images, and high-detail graphics, AVIF preserves quality better. |
| Browser Support | ~97% (Universal). Supported by all modern browsers, including Chrome, Firefox, Safari, and Edge . | ~94% (Growing Fast). Supported by Chrome 85+, Firefox 93+, Safari 16.4+, and Edge 121+ . Fallback is essential for the remaining users. | WebP is the safest default fallback. A modern optimization strategy must serve AVIF first, then fall back to WebP, and finally to JPEG/PNG. This is handled automatically by top-tier plugins. |
| Encoding/Decoding | Fast encoding. Low CPU and memory usage for decoding by the browser. | Slower encoding (more CPU-intensive). Decoding cost is slightly higher but manageable for modern devices. | Server-side bulk conversion to AVIF can be resource-intensive on shared hosting. Offloaded optimization (via a plugin’s cloud service) or a CDN is ideal. |
| Feature Set | Lossy & Lossless Compression, Transparency (Alpha Channel), Animation. | All WebP features plus High Dynamic Range (HDR) and 12-bit color depth, allowing for a wider range of colors and contrasts . | For advanced visual needs like displaying HDR photography or complex gradients, AVIF is the only next-gen option. |
| WordPress Ecosystem | Natively supported for upload since WordPress 5.8. Fully supported by all major optimization plugins and CDNs. | Natively supported for upload since WordPress 6.5. Now a primary feature in leading plugins like ShortPixel, Imagify, and Optimole . | The ecosystem is mature for both. However, adopting an AVIF-first strategy is the “future-proof” choice that top performance solutions now prioritize. |
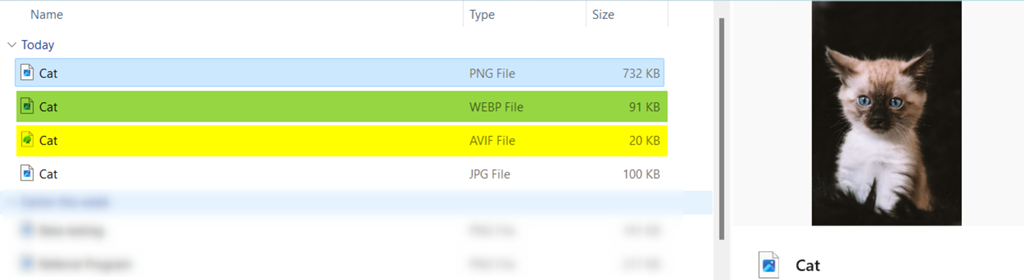
Visual Evidence: Seeing is Believing
Quantitative data is compelling, but a direct visual comparison demonstrates the power of modern compression. The image below shows the same source file saved in four different formats. While the visual quality is nearly identical to the naked eye, the file size reduction achieved by WebP, and especially AVIF, is dramatic. A 732 KB PNG can be reduced to just 20 KB in AVIF format—a 97% reduction—without a noticeable drop in quality.
To further illustrate this, the following chart visualizes the average file size savings. It’s clear that for any performance-oriented website, moving away from JPEG and PNG is no longer a suggestion but a necessity.
Part 2: Implementing Next-Gen Images in WordPress: A Step-by-Step Guide
Transitioning your WordPress site to next-gen formats can seem daunting, but modern tools have streamlined the process. There are two primary paths: the fully automated plugin workflow, which is ideal for the vast majority of users, and the advanced developer workflow, which offers granular control for complex or custom setups.
Path A: The Automated Plugin Workflow (Recommended for 95% of Users)
For most site owners and agencies, an optimization plugin is the most efficient and reliable method. These tools handle compression, format conversion, and delivery logic automatically, ensuring a consistent, site-wide implementation with minimal manual effort.
1. Step 1: Choose Your Optimization Powerhouse
A high-quality image optimization plugin is an investment, not an expense. When selecting one, prioritize the following features:
- AVIF & WebP Conversion: The plugin must be able to generate both formats.
- Automatic Fallbacks: It should intelligently serve the best format based on the user’s browser (e.g., AVIF for Chrome, WebP for an older browser).
- Bulk Optimization: A tool to process your entire existing media library is essential.
- CDN Integration: The ability to serve images from a Content Delivery Network dramatically improves global load times.
- Non-Destructive Backups: It must keep your original uploads safe in case you need to restore them.
As of 2025, these are the top-tier recommendations based on features, reliability, and security Patchstack, :
- ShortPixel: A developer favorite known for its superior compression algorithms. It offers flexible pricing with monthly plans or one-time credit bundles and was one of the first to robustly support AVIF.
- Imagify: Developed by the team behind WP Rocket, it’s exceptionally user-friendly with three distinct compression levels (Normal, Aggressive, Ultra). It offloads the heavy processing to its own servers, protecting your site’s performance.
- Optimole: An all-in-one solution that combines real-time optimization with a built-in CDN. It dynamically resizes images based on the visitor’s device, ensuring no wasted pixels are delivered.
- EWWW Image Optimizer: A highly flexible plugin that offers both on-server optimization for full control and an optional cloud-based service (Easy IO CDN) for offloaded processing and delivery.
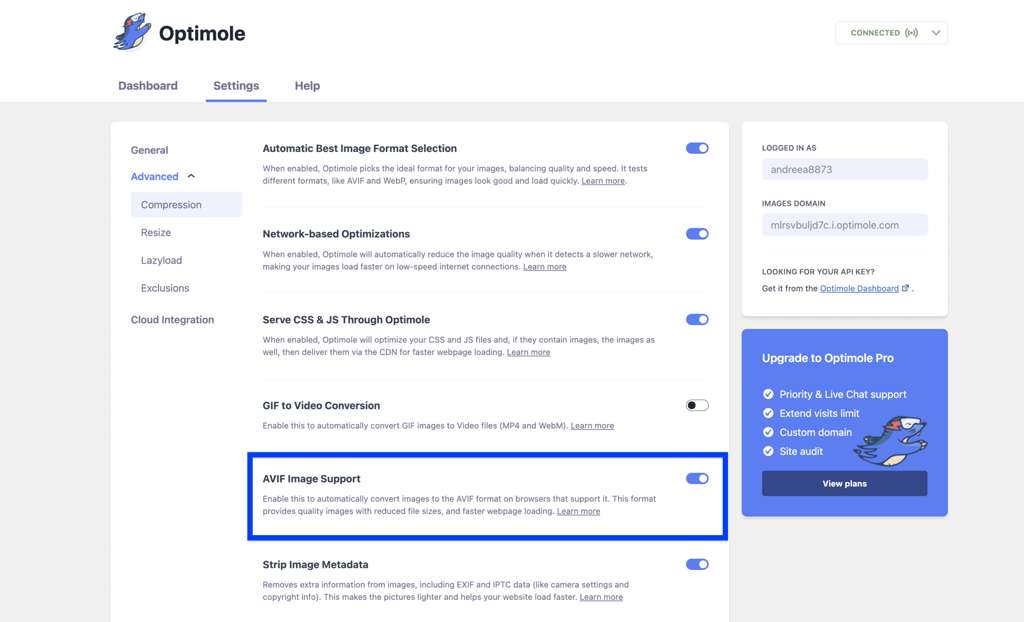
2. Step 2: Configure for Peak Performance
Once you’ve installed your chosen plugin, the configuration is key. We’ll use the settings from Optimole as a representative example, as they clearly lay out the modern best practices.
- Connect Your Site: Most plugins require you to create a free account and connect your site with an API key.
- Enable Next-Gen Formats: In the plugin’s settings (often under an “;Advanced” or “Compression” tab), ensure that “AVIF Image Support” is enabled. The plugin should automatically use WebP as a fallback.
- Choose Compression Level: Select a lossy compression level. While “lossless” sounds safe, “lossy” compression provides far greater file size reduction with quality loss that is typically imperceptible.
- Enable Other Key Features:
- Strip Image Metadata: Removes unnecessary EXIF data (camera settings, location) to further reduce file size.
- Lazy Loading: Most optimization plugins include their own lazy loading feature. We will discuss this in-depth in Part 3.
- Device-Aware Resizing: If available (as in Optimole), enable this to serve perfectly sized images for every screen.
- Backup Originals: Before proceeding, double-check that the plugin is configured to back up your original images. This is a critical safety net.
3. Step 3: Bulk Optimize Your Existing Media Library
Your settings will apply to all new uploads automatically. However, to optimize your existing content, you must use the “Bulk Optimizer” tool. This is typically found in the plugin’s dashboard or under `Media > Bulk Optimize`. Start the process and allow it to run in the background. For large libraries, this can take several hours, but it’s a one-time process that will transform your site’s performance.
4. Step 4: Verify the Results
Once the optimization is complete, it’s crucial to verify that it’s working correctly on the front end.
- Open your website in a private/incognito browser window to ensure you’re not being served cached files.
- Right-click on an image that should be optimized and select “Inspect” to open the browser’s Developer Tools.
- Navigate to the “Network” tab and filter the requests by “Img”.
- Reload the page.
- Examine the list of image files. In the “Type” column, you should see `avif` or `webp`. If you see `jpeg` or `png`, the conversion is not working correctly. Check your plugin settings and clear any server-side or CDN caches.
Path B: The Advanced Developer Workflow (For Maximum Control)
For developers who require granular control, manage deployments via Git, or work in environments where plugins are restricted, a manual or semi-automated approach is necessary. This path requires server access and a deeper technical understanding.
1. Step 1: Server Environment Prerequisites
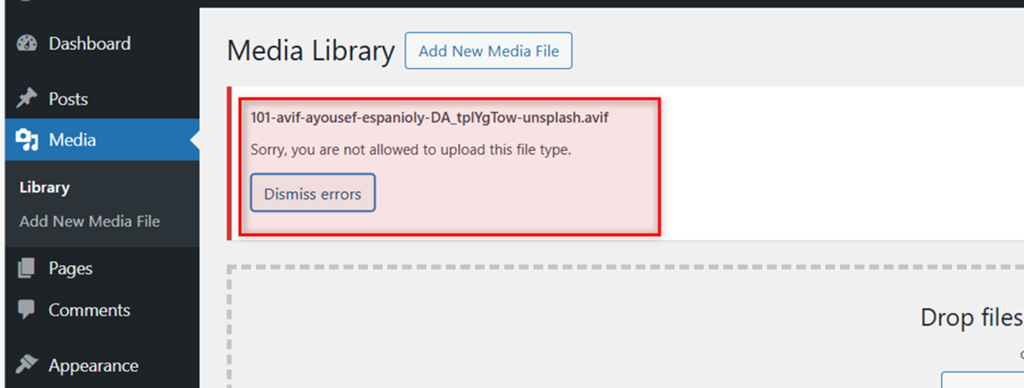
WordPress’;s native ability to handle AVIF/WebP depends on the underlying server configuration. Specifically, the PHP image processing library (either GD or ImageMagick) must be compiled with support for these formats.
- Check via WordPress Site Health: The easiest method. Navigate to `Tools > Site Health > Info`. Expand the “Media Handling” section and look for “AVIF” and “WebP” in the list of supported formats.
- Check via `phpinfo()`: Create a PHP file with “ and load it in your browser. Search the page for “AVIF Support” or “WebP Support”. It should show “enabled”.
- Check via SSH: If you have command-line access, you can run `php -i | grep -i ‘avif support’` to quickly check.
If support is not enabled, you will need to contact your hosting provider or, if you manage the server, recompile PHP with the necessary flags.
2. Step 2: Configure Server-Side Content Negotiation
This powerful technique allows your web server (Apache or Nginx) to automatically serve a next-gen image if it exists and the browser supports it, without changing the `` tag’;s `src` attribute. For example, if the HTML requests `image.jpg`, the server can deliver `image.jpg.avif` instead.
This requires you to have pre-converted versions of your images available (e.g., `image.jpg`, `image.jpg.webp`, `image.jpg.avif`).
Nginx Configuration (`nginx.conf` or site-specific config):
This configuration tells Nginx to check for an `.avif` version, then a `.webp` version, before falling back to the original file.
# In your server block
location ~* \.(jpe?g|png|gif)$ {
    add_header Vary Accept;
    try_files $uri.avif $uri.webp $uri =404;
}
Apache Configuration (`.htaccess` file):
This set of rules achieves the same result on Apache servers, using `mod_rewrite` to serve the appropriate format based on the browser’s `Accept` header.
<IfModule mod_rewrite.c>
  RewriteEngine On

  # Serve AVIF if supported and file exists
  RewriteCond %{HTTP_ACCEPT} image/avif
  RewriteCond %{DOCUMENT_ROOT}/$1.avif -f
  RewriteRule ^(.*)\.(jpe?g|png)$ $1.avif [T=image/avif,L]

  # Serve WebP if supported and file exists
  RewriteCond %{HTTP_ACCEPT} image/webp
  RewriteCond %{DOCUMENT_ROOT}/$1.webp -f
  RewriteRule ^(.*)\.(jpe?g|png)$ $1.webp [T=image/webp,L]
</IfModule>

<IfModule mod_headers.c>
  Header append Vary Accept env=REDIRECT_accept
</IfModule>
Source for server configurations adapted from Cloudways.
3. Step 3: Automate Conversion in Your Workflow
Manually converting every image is not scalable. Developers should integrate conversion into their deployment or management workflow.
- Using WP-CLI: If you use an optimization plugin that supports the WordPress Command-Line Interface (like ShortPixel), you can trigger bulk optimizations via SSH. This is perfect for automating tasks on a server. For example: `wp shortpixel bulk –media-library –format=avif,webp`.
- CI/CD Pipeline Integration (e.g., GitHub Actions): For development teams using Git, this is the most robust solution. A GitHub Action can be configured to run on every pull request or merge to the main branch. It automatically finds, compresses, and converts images within the repository before the code is deployed to the live server. This ensures that no unoptimized image ever reaches production. Popular actions for this include `calibreapp/image-actions` and `Image Optimizer` from the GitHub Marketplace .
Part 3: Mastering Lazy Loading in WordPress
Core Concept: Deferring the Unseen
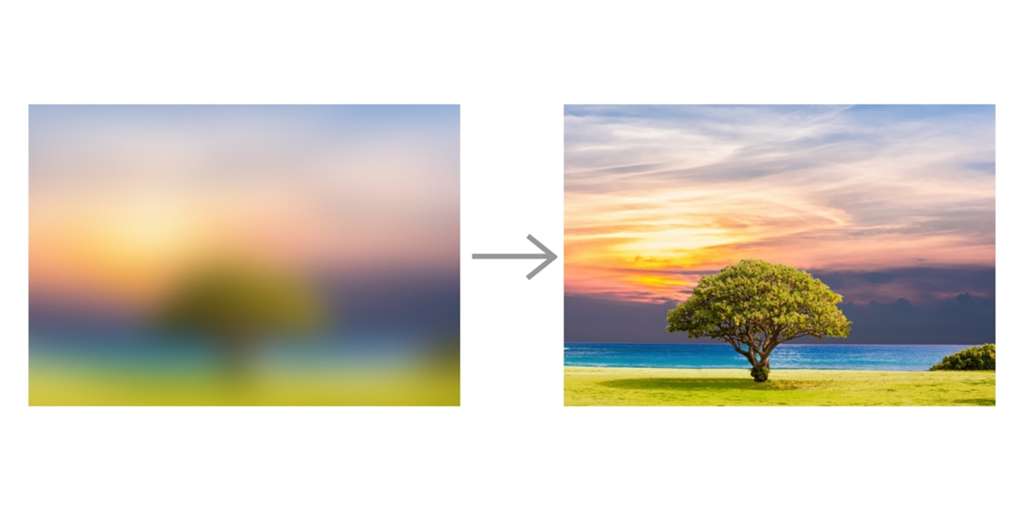
Lazy loading is a performance optimization technique that defers the loading of non-critical resources—primarily images and iframes—at page load time. Instead of loading all media at once, assets that are “below the fold” (outside the user’s initial viewport) are only fetched as the user scrolls down towards them . This simple change has a profound impact: it dramatically reduces the initial page weight, shortens the critical rendering path, and improves key metrics like First Contentful Paint (FCP) and Largest Contentful Paint (LCP).
Method A: WordPress Native Lazy Loading (The Default Standard)
Recognizing the universal benefit of lazy loading, the web platform standardized it with the `loading` attribute. WordPress adopted this standard swiftly, making it a core feature.
1. How it Works
Since WordPress 5.5, the platform automatically adds the `loading=”;lazy”` attribute to `` and `
2. The LCP Exception: A Smart Default
A common mistake is to lazy-load images that are visible “above the fold,” especially the LCP element. This is counter-productive, as it delays the loading of the most important visual content on the page. To combat this, WordPress 5.9 introduced an intelligent enhancement: it automatically detects the first image or iframe on the page and skips adding the `loading=”lazy”` attribute to it, assuming it is the LCP element .
3. Verification and Manual Exclusion
While the default behavior is smart, it’s not foolproof. You must always verify its application and manually intervene if necessary.
- Verification: On your live site, right-click any image below the fold and “Inspect”. The `
` tag should contain `loading=”lazy”`. Then, inspect your main hero image or logo above the fold; it should *not* have this attribute.
- Manual Exclusion: If WordPress’s automatic detection fails (e.g., your LCP element is a CSS background image or not the very first `
` tag), you must manually exclude it. The cleanest way is to use a filter in your theme’s `functions.php` file to prevent lazy loading on images with a specific CSS class.
/**
 * Exclude images with the 'no-lazy' class from WordPress native lazy-loading.
 *
 * @param bool|string $default The default value.
 * @param string      $tag_name The tag name.
 * @param string      $context The context.
 * @return bool|string
 */
add_filter( 'wp_lazy_loading_enabled', function( $default, $tag_name, $context ){
  // Check for the 'no-lazy' class in the image tag.
  if ( 'img' === $tag_name && false !== strpos( $context, 'class="no-lazy"' ) ) {
    return false; // Disable lazy-loading for this image.
  }
  return $default;
}, 10, 3 );
You can then add `class=”no-lazy”` to any critical `` tag in your theme templates or via the block editor’s “Additional CSS Class(es)” field to prevent it from being lazy-loaded.
Method B: Plugin-Enhanced Lazy Loading (For Videos & Backgrounds)
Native lazy loading is excellent but has limitations. It does not apply to CSS `background-image` properties, and its handling of videos is basic. For comprehensive media deferral, a performance plugin is essential.
1. Why a Plugin is Still Necessary
- Video Placeholders: A plugin can replace a heavy YouTube or Vimeo iframe with a lightweight preview image. The full video player is only loaded when the user clicks the preview, saving megabytes on initial page load.
- Background Images: Many themes use large background images for hero sections or page banners. A plugin can lazy-load these, which is impossible with the native `loading` attribute.
- Granular Control: Plugins offer user-friendly interfaces to exclude specific images, adjust the loading threshold (how close to the viewport an image must be to start loading), and add loading animations.
2. Recommended Plugins for Advanced Lazy Loading
- WP Rocket: Widely regarded as one of the best all-in-one performance plugins. Its “Media” tab provides simple toggles for enabling lazy loading on images, CSS background images, and iframes/videos, including the YouTube preview image replacement feature.
- Perfmatters: A lightweight, highly-focused performance plugin created by developers for developers. It offers granular control over lazy loading, including options for different JavaScript-based methods (like Intersection Observer) and DOM monitoring to catch dynamically added images.
3. Configuration Steps (Using WP Rocket as an Example)
- Navigate to `Settings > WP Rocket` in your WordPress dashboard.
- Click on the “Media” tab.
- Enable “LazyLoad for images”.
- Enable “LazyLoad for CSS background images”. This is a crucial feature for many modern themes.
- Enable “LazyLoad for iframes and videos” and ensure the sub-option “Replace YouTube iframe with preview image” is also checked.
- In the “Excluded Images or iframes” box, add the filenames, CSS classes, or domains of any above-the-fold assets you need to exclude. For example, add `logo.png` or `hero-background.jpg` to ensure they load immediately.
By combining WordPress’s native functionality with a powerful plugin, you create a robust, multi-layered lazy loading strategy that covers virtually all media types, ensuring the fastest possible initial render for your users.
Part 4: Advanced Video Optimization for WordPress
Video is an unparalleled tool for engagement, but it is also the single heaviest asset you can add to a webpage. A single 30-second 1080p video can easily exceed 50 MB, instantly crippling your page speed if not handled correctly . A successful video strategy for WordPress revolves around offloading, compression, and smart delivery.
The Cardinal Rule: Never Upload Video Directly to WordPress
Uploading a video file directly to the WordPress Media Library is the most common and most damaging mistake a site owner can make. Here’s why it’s a performance disaster:
- Massive Server Load: Your web hosting server is optimized for serving text and images, not for streaming large video files. Every visitor playing the video puts a direct strain on your server’s CPU and bandwidth.
- No Adaptive Bitrate Streaming: When you self-host, you serve the same large file to everyone, regardless of their internet speed. Professional video platforms use adaptive streaming to deliver a lower-quality stream to users on slow connections, preventing buffering.
- Increased Backup Size: Large video files bloat your website backups, making them slow to create and difficult to restore.
- Bandwidth Costs: Many hosting plans have bandwidth limits. A few popular videos could quickly exceed your quota, leading to overage charges or a suspended account.
Step 1: Host Videos Externally
The correct approach is to offload video hosting to a dedicated platform built for video delivery. This shifts the performance burden from your server to a global infrastructure optimized for streaming.
- YouTube & Vimeo: The most popular choices for public-facing content. They are free, handle all encoding and delivery, and are easily embeddable in WordPress.
- Wistia: A premium, business-focused platform offering advanced analytics, lead generation tools, and a customizable player. Ideal for marketing and training videos.
Once uploaded, you can embed the video in WordPress by simply pasting the URL into the block editor, which will automatically convert it into the appropriate embed block.
Step 2: Compress Before Uploading
Even when using a platform like YouTube, you should compress your video *before* uploading it. A smaller source file will upload faster and gives the platform’;s compression algorithm a better-quality starting point. The goal is to find the best balance between file size and visual quality.
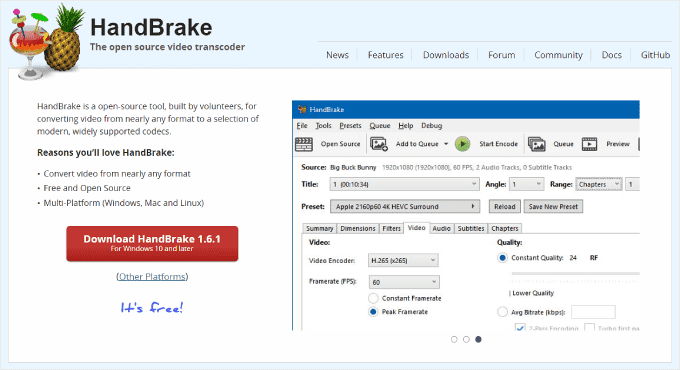
Tool Recommendation: HandBrake
HandBrake is a free, open-source, and incredibly powerful desktop video transcoder available for Windows, Mac, and Linux. It provides all the tools needed to create a web-optimized MP4 file.
- Open your source video in HandBrake.
- Choose a Preset: Start with one of the “Web” presets, like “Vimeo YouTube HQ 1080p60”.
- Format: Ensure “MP4” is selected.
- Video Tab:
- Video Encoder: Use `H.264 (x264)`. It offers the best combination of quality, file size, and universal compatibility.
- Framerate (FPS): Match the source, or choose 30.
- Quality: Select “Constant Quality” and use an RF (Rate Factor) value between 20 and 24. A lower number means higher quality and a larger file. 22 is a great starting point.
- Check “Web Optimized”: This is a crucial step. It rearranges the file’s structure to allow it to start playing before it has fully downloaded.
- Start Encode: Process the video and upload the new, smaller MP4 file to your chosen hosting platform.
Step 3: Implement Advanced Video Lazy Loading
As discussed in Part 3, simply lazy-loading the `
Step 4: Leverage Video Schema for SEO Dominance
To maximize your video’s visibility in search results, you must tell search engines about it using structured data. `VideoObject` schema is a code snippet that provides Google with explicit details like the video’s title, description, duration, and thumbnail URL. This information makes your content eligible for video-rich snippets in search results, which include a thumbnail and can significantly increase click-through rates .
Implementation with an SEO Plugin:
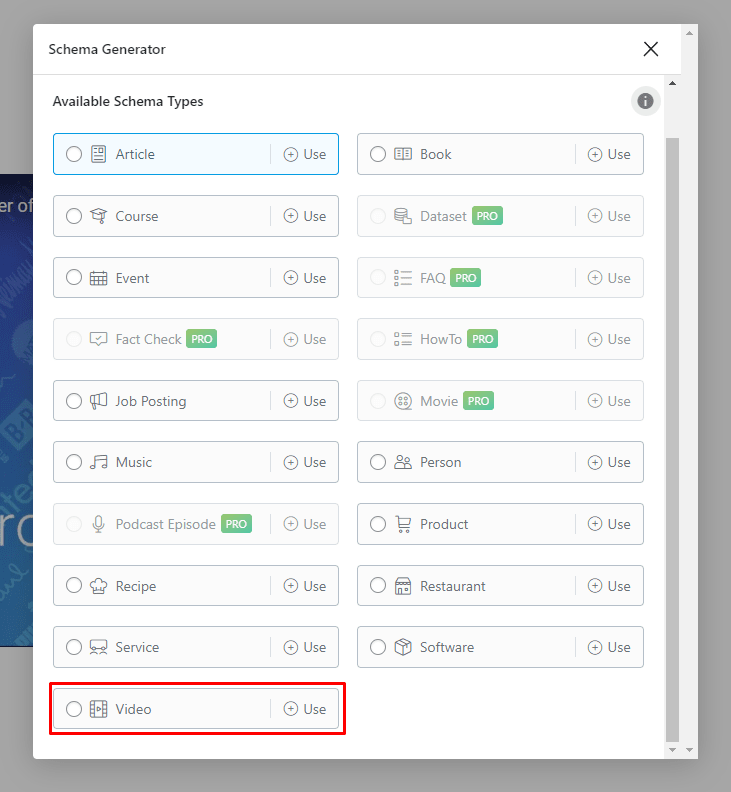
The easiest way to add video schema is with a comprehensive SEO plugin like Rank Math or All in One SEO (AIOSEO). These tools have built-in Schema Generators.
- Edit the post or page containing your embedded video.
- Scroll down to the SEO plugin’s settings box (usually below the content editor).
- Navigate to the “Schema” or “Structured Data” tab.
- Click “Add Schema” or “Generate Schema”.
- From the list of schema types, select “Video”.
- Fill in the required fields:
- Headline: The title of your video.
- Description: A brief summary of the video’s content.
- Content URL: The direct URL to the video file (if available).
- Embed URL: The embed URL from YouTube or Vimeo (e.g., `https://www.youtube.com/embed/VIDEOID`).
- Thumbnail URL: A URL for a high-quality thumbnail image.
- Duration: The video’s length in ISO 8601 format (e.g., `PT5M30S` for 5 minutes and 30 seconds).
- Save the schema. The plugin will automatically insert the correct JSON-LD code into your page’s header.
Part 5: Measuring Success & Finalizing Your SEO Workflow
Optimization without measurement is just guesswork. To confirm the impact of your efforts and continuously refine your strategy, you must use a combination of performance analysis tools. This final section covers how to measure your success, integrate final SEO touches, and understand the role of a CDN in completing your performance puzzle.
The Measurement Toolkit: Quantifying Performance Gains
Use these tools to establish a baseline before you begin and to measure the improvements after implementing the strategies in this guide.
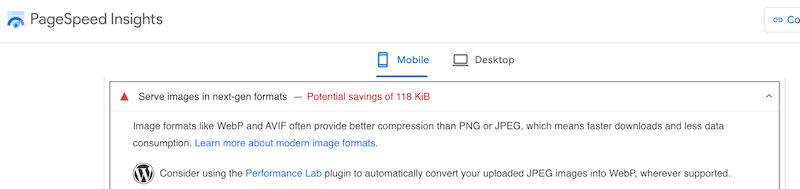
- Google PageSpeed Insights (PSI): This is your primary tool for checking Core Web Vitals. Run a test and pay close attention to your LCP, INP, and CLS scores. PSI will also provide specific “;Opportunities” like “Serve images in next-gen formats” or “Defer offscreen images.” Your goal is to turn these warnings from red or orange to green.
- GTmetrix / WebPageTest: These tools provide detailed waterfall charts that visualize the loading process of every single asset on your page. Use the waterfall to compare the “before” and “after” file sizes and load times of your images. You can see exactly how many kilobytes you’ve saved and how much faster your images are rendering.
- Browser Developer Tools (Network Tab): As described in Part 2, this is the best tool for real-time verification. Use it to confirm that the correct image format (`avif`/`webp`) is being served and that below-the-fold images are indeed being lazy-loaded (the “Initiator” column will often show a JavaScript source instead of “parser”).
Before-and-After Case Study: The Tangible Impact
The results of a comprehensive media optimization strategy are not subtle. Based on real-world case studies, a typical WordPress site can expect dramatic improvements across key performance indicators.
| Metric | Before Optimization | After Optimization | Improvement |
|---|---|---|---|
| Largest Contentful Paint (LCP) | 12.8s | 2.5s | -80.5% |
| Total Page Size | 4,912 KB | 1,629 KB | -66.8% |
| PageSpeed Insights Score (Mobile) | 36 / 100 | 98 / 100 | +172% |
| Core Web Vitals Assessment | Failed | Passed | Pass |
Data synthesized from case studies by Mugo.ca and RabbitLoader.
These are not just vanity metrics. A faster LCP and a passing Core Web Vitals score translate directly into better user engagement and higher search engine rankings, which in turn drive more traffic and revenue.
Integrating Image SEO Best Practices
Performance is only one side of the optimization coin. To maximize your visibility in Google Images and improve accessibility, you must also follow on-page SEO best practices for your media.
- Descriptive, Keyword-Rich File Names: Before uploading, rename your files from generic names like `IMG_1234.jpg` to descriptive ones like `wordpress-avif-optimization-guide.avif`. This gives search engines immediate context about the image’s content.
- Comprehensive Alt Text: The `alt` attribute is crucial for both accessibility (it’;s read aloud by screen readers) and SEO. Write a concise, descriptive sentence that accurately describes the image. If appropriate, include your target keyword, but avoid keyword stuffing. SEO plugins like Yoast and Rank Math include checks to ensure your key images have alt text .
The Role of a Content Delivery Network (CDN)
A CDN is the final piece of the performance puzzle. It’s a global network of servers that stores copies (caches) of your static assets, including your newly optimized images and videos. When a user visits your site, the CDN delivers these assets from a server that is geographically closest to them, dramatically reducing network latency .
For a website with a global audience, a CDN is non-negotiable. It ensures that a user in Tokyo has the same fast-loading experience as a user in New York. Many optimization plugins (like Optimole, EWWW’;s Easy IO) have a CDN built-in. Others integrate seamlessly with standalone CDN providers like Cloudflare, Bunny CDN, or KeyCDN.
People Also Ask (FAQs)
Which is better for WordPress, AVIF or WebP?
As of July 2025, AVIF is generally better for performance due to its superior compression, offering up to 50% smaller file sizes than JPEG. However, WebP has broader browser support and faster encoding. The best strategy is to serve AVIF to supported browsers with an automatic fallback to WebP, a feature most modern optimization plugins handle automatically.
Does WordPress support AVIF and WebP natively?
Yes. WordPress has supported WebP since version 5.8 and added native support for the AVIF format in version 6.5. This means you can upload these formats directly to the Media Library, provided your server’s image processing library (like GD or ImageMagick) is configured to support them.
How do I lazy load videos in WordPress?
While WordPress natively lazy loads iframes (which includes many video embeds), dedicated plugins like WP Rocket or Lazy Load for Videos offer more robust control. These plugins replace the heavy video player with a lightweight thumbnail, only loading the full video when the user clicks to play. This dramatically improves initial page load speed.
Should I lazy load images above the fold?
No, you should never lazy load images that are visible in the initial viewport (above the fold), especially your LCP (Largest Contentful Paint) element. Lazy loading these critical images will delay their rendering and harm your Core Web Vitals score. WordPress 5.9 and newer versions automatically attempt to exclude the first image from lazy loading, but it’s crucial to verify and manually exclude hero images or logos if necessary.
Do I still need an image optimization plugin if WordPress supports WebP/AVIF?
Yes, a plugin is highly recommended. While WordPress allows you to upload next-gen formats, a plugin automates the entire workflow: it compresses images, converts your existing JPEG/PNG library to WebP/AVIF, serves the correct format to the right browser (fallback), and integrates with a CDN for faster delivery. This automation is key for consistent, site-wide optimization.
Conclusion: From Optimized Media to Market Dominance
In 2025, the path to a high-performing WordPress site is paved with intelligently optimized media. We have moved beyond simple compression to a sophisticated, multi-layered strategy that is both powerful and accessible. The winning formula is clear: a combination of superior compression (an AVIF-first approach with a WebP fallback), intelligent loading (a hybrid of native and plugin-enhanced lazy loading), and smart delivery (a global CDN).
By following the step-by-step guides in this report, you are not just tweaking settings or shaving kilobytes; you are fundamentally re-architecting how your website delivers its most engaging content. You are building a faster, more responsive, and more satisfying experience that both users and search engines will reward. The performance gains are not theoretical—they are measurable, impactful, and directly tied to your site’s success.
Your website’s speed is a direct reflection of your brand’s commitment to user experience. In a digital marketplace where every millisecond counts, don’t let slow media hold you back from achieving your goals. The tools and techniques are at your fingertips.
Take the Next Step
Ready to transform your site’s performance and dominate your niche? Start implementing these strategies today. For a personalized performance audit and a tailored optimization plan designed to meet your specific business objectives, contact our WordPress performance experts now or explore our comprehensive optimization services. Let’s build a faster web, together.

With over 27 years of hands-on SEO expertise, starting from my early days as a CFO. Quitting that job to build a top-ranked web hosting business in 1995, I’ve mastered WordPress optimization as a precise engineering discipline. Through extensive research, high-level consulting, and developing a WordPress site that achieved over a thousand organic Google rankings—culminating in a six-figure sale—I’ve decoded Google’s algorithm over 27 years to develop wordpress engineering that transforms underperforming WordPress sites into authoritative powerhouses. Business owners frustrated by stagnant traffic, low visibility, and missed opportunities find relief as I help them deliver measurable ROI through higher rankings, increased leads, and sustainable growth. As owner of dominant city-based SEO platforms in major U.S. markets, I outperform industry gurus, empowering entrepreneurs, local businesses, agencies, and marketers via my WordPress Optimization services at wordpressoptimization.com to unlock their site’s full potential.